
7 BSM Cartridge
Oct 15th 2025
7 BSM Overview
The 7 BSM, designed by Bryan Blake, is a necked‑down 7 mm (.284") wildcat based on virgin Lapua .300 WSM brass. Bryan Blake's core principle in wildcat development is to base all cartridges on Lapua brass, ensuring long-term availability and consistent quality. In contrast to cartridges reliant on brass from smaller or inconsistent suppliers, Lapua brass guarantees reliability well into the future.
One of the primary goals in creating the 7 BSM was to offer shooters a non-fi reforming wildcat, a rare convenience in the precision shooting world. Unlike many wildcats that require time consuming and resource intensive fi reforming steps, the 7 BSM can be formed in a single sizing operation and is ready to shoot with minimal brass preparation. This makes it extremely user friendly and cost-effective for high volume shooters.
Though originally designed with F-Class competition shooting in mind, the 7 BSM also proves to be an excellent long-range hunting cartridge. It maintains ballistic performance similar to the highly decorated 7 RSAUM (Remington Short Action Ultra Magnum), a cartridge that won the 2013, 2017, and 2023 F-Class World Championships. However, unlike the 7 RSAUM (Remington Short Action Ultra Magnum), which suffers from limited and inconsistent brass availability, the 7 BSM overcomes that limitation by using Lapua .300 WSM brass.
With a case capacity close to 75 gr H₂O, the 7 BSM slightly exceeds the 72.5 gr capacity of the 7 RSAUM (Remington Short Action Ultra Magnum), allowing for reduced pressures and better brass life over multiple fi rings. Although higher capacity options like the 7-300 WSM exist, they typically suffer from decreased efficiency, requiring more powder to reach the same velocity.
The cartridge's 40° shoulder angle was deliberately chosen for optimal performance. This angle provides excellent brass life, superior headspacing consistency, and minimal case growth over repeated fi rings. All crucial attributes for serious competitors and reloaders.
DISCLAIMER:
This data has been accumulated from many different rifl es, powders, powder lots, primers, cases, and bullets. It is the reloader's responsibility to ensure their rifl e is in good condition and can withstand the pressures that the 7 BSM was designed for (60,000 PSI+). The action and barrel must be headspaced and chambered by a competent gunsmith to correct dimensions. All loads must be worked up starting from the
minimum charge. The barrel should be at least 1.200" diameter for the length of the chamber and no less than .600" at the muzzle. The reloader assumes all risk involved; this data is only a guideline and not a sole data source for all barrels and rifles. Different barrel manufacturer groove or bore diameter variations can cause excessive pressure and bodily injury—have your barrel checked by a competent gunsmith. Use all practical care when reloading, applying your own skills and experience to avoid unsafe loads.
Brass Forming & Preparation
A quick overview of the steps we follow to ensure uniform and reliable brass for consistent reloading:
This cartridge was designed around virgin Lapua 300 WSM brass for optimal performance but you could use other manufacturers brass.
Starting with LAPUA 300 WSM virgin brass, we form it, turn the neck, trim it to length, anneal, expand, and it is ready to load. After thousands of rounds of testing, the brass in the virgin state will shoot extremely accurate, so no need to fire the brass first before using it for your final intended purposes, also referred to as fire forming.
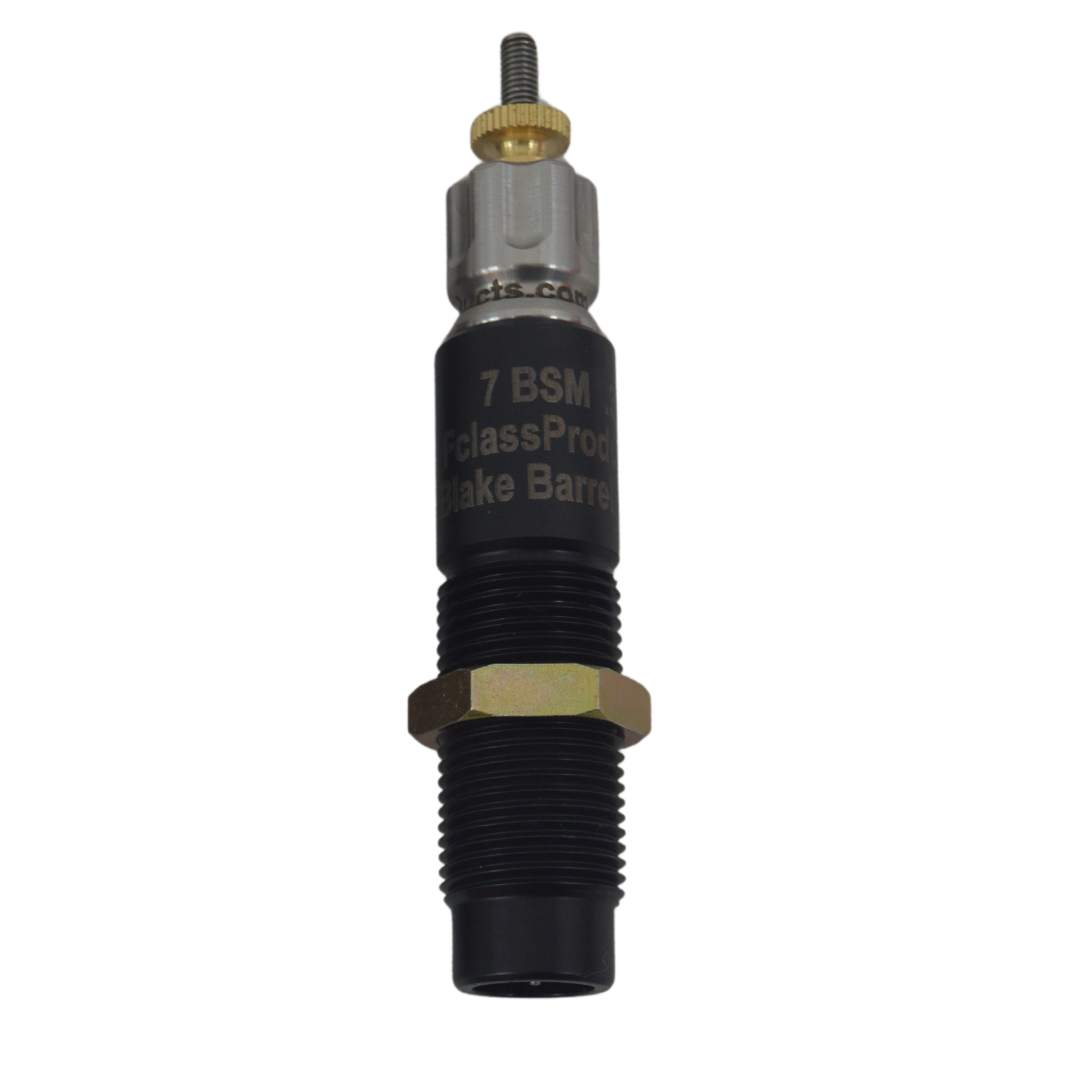
Setting Up the Full‑Length Sizing Die
-
Ensure the proper shell plate is installed in your press.
-
Lower the press handle until the ram is fully raised and bottomed out.
-
Screw the provided full‑length sizing die down until it contacts the shell plate, then back it off to achieve approximately .010" of clearance.
-
Lock the die in place, this establishes your starting point for precise die adjustment.
Forming the Brass
|
Take brand new Lapua 300 WSM brass, sufficiently lube the neck and shoulder area with lube. We find "Royal Case & Die Lube" by SharpShoot-R Precision Products in the spray can to be the most effective and is what we recommend. Proper lubrication is critical, insufficient lube may result in the brass getting stuck in the forming die, which can damage both the case and the die. |
Adjusting the Full-Length Resizing Die
-
Using your sufficiently lubed brass, insert it into the shell plate and run it through the die. When the brass is inserted into the die, the brass is then formed from a 35 degree shoulder to a 40 degree shoulder.
-
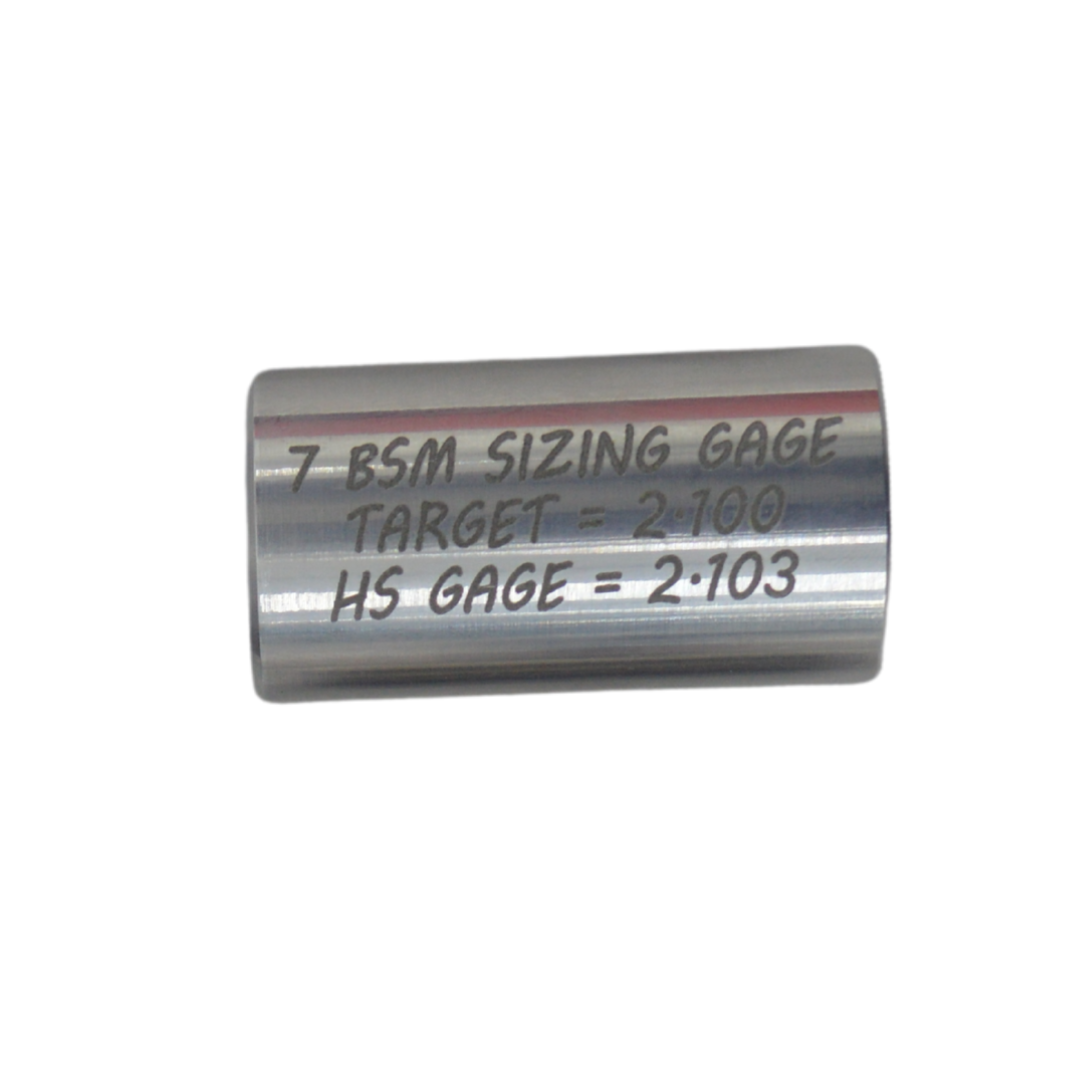
Once the brass has been sized, remove it from the press and insert it into the 7 BSM case resizing gauge provided.
On the gauge you will see two numbers, one labeled "HEADSPACE GAUGE" and one labeled "TARGET". We always chamber our barrels to be on zero headspace, so the TARGET number on that gauge is .003” less than the headspace number to allow .003” bump back when chambered.
When the resized brass is inserted into the resizing gage and measured with calipers, you will be able to see how much bump back you have applied to the case. The goal is to reach the target number, which will supply .003" bump back to your case.
Warning: If you bump the shoulder back too far, the brass can experience excessive stretching or thinning of the case web and shoulder area. This overworking can lead to cracks, splits, or premature case head separation, drastically reducing the life of your brass and risking unsafe pressure conditions. Work incrementally and always ensure you reach at least the target bump back measurement to maintain proper head spacing.
-
You probably at this point will have a number that is .005” too long still. That’s okay, adjust your die down closer to the shell plate in small increments, then resize that brass and check the headspace length again. Keep adjusting until you hit the target number on the gauge.
Consistency Tips: The speed at which you run brass through the die and the amount of lubrication applied to each case significantly affect sizing consistency. Run the brass at a steady and uniform rate, rushing or hesitating can alter how the brass flows. Likewise, apply the same amount of lubricant to each case to avoid uneven friction, which can cause some cases to be sized more aggressively or get stuck. Consistency in both speed and lubrication is key to achieving uniform cases every time.
Trim or Turn Necks
At this point, you have two options: you can either trim the brass to length first or turn the necks before trimming. Both approaches are acceptable and can be chosen based on your equipment and workflow.
-
Trimming: Trim the brass to 2.020”. This allows approximately .015" of room for brass growth from the 2.035” chamber. This ensures safe and consistent chamber fit across firings. Included in the complete 7 BSM Bundle Kit is a Giraud case holder, which allows you to quickly and precisely trim overall length to the target 2.020” dimension.
-
Neck Turning: The 7 BSM chamber has a neck diameter of .314". To allow for proper clearance when the bullet is seated, we recommend a loaded neck diameter of .309”, which gives .005” diametrical clearance.
|
To achieve this, you should aim for a neck wall thickness of .0125”. The calculation works as follows: 0.284" (bullet diameter) + 0.0125" (neck wall) × 2 = 0.309" total loaded neck diameter. We recommend turning necks after forming using a tool such as the AUTODOD, which turns both the inside and outside of the neck simultaneously. This produces very uniform neck walls and consistent neck tension. |
 |
Personally, I turn the necks first, then trim the case length. However, you could trim first, then turn, either sequence works. Just be sure to do both steps before continuing.
Annealing and Expanding
At this stage, the neck of the brass will be too small to seat a bullet. This is expected, the full-length sizing die used in the forming step has a neck diameter of .306”, and if you’ve turned your necks, that will further reduce the internal neck diameter.
Before expanding, we recommend first annealing the brass. The sizing and forming process work-hardens the neck, and annealing will soften the brass to ensure smooth and consistent neck expansion without inducing stress or cracking.
-
We use an AMP Annealer with setting 177 and a 20A pilot.
-
Lightly spray the inside of the necks with Royal Case & Die Lube before expanding. This reduces friction on the mandrel and helps maintain concentricity.
-
After annealing, expand the neck using a .283 expander mandrel.
Ready to Load
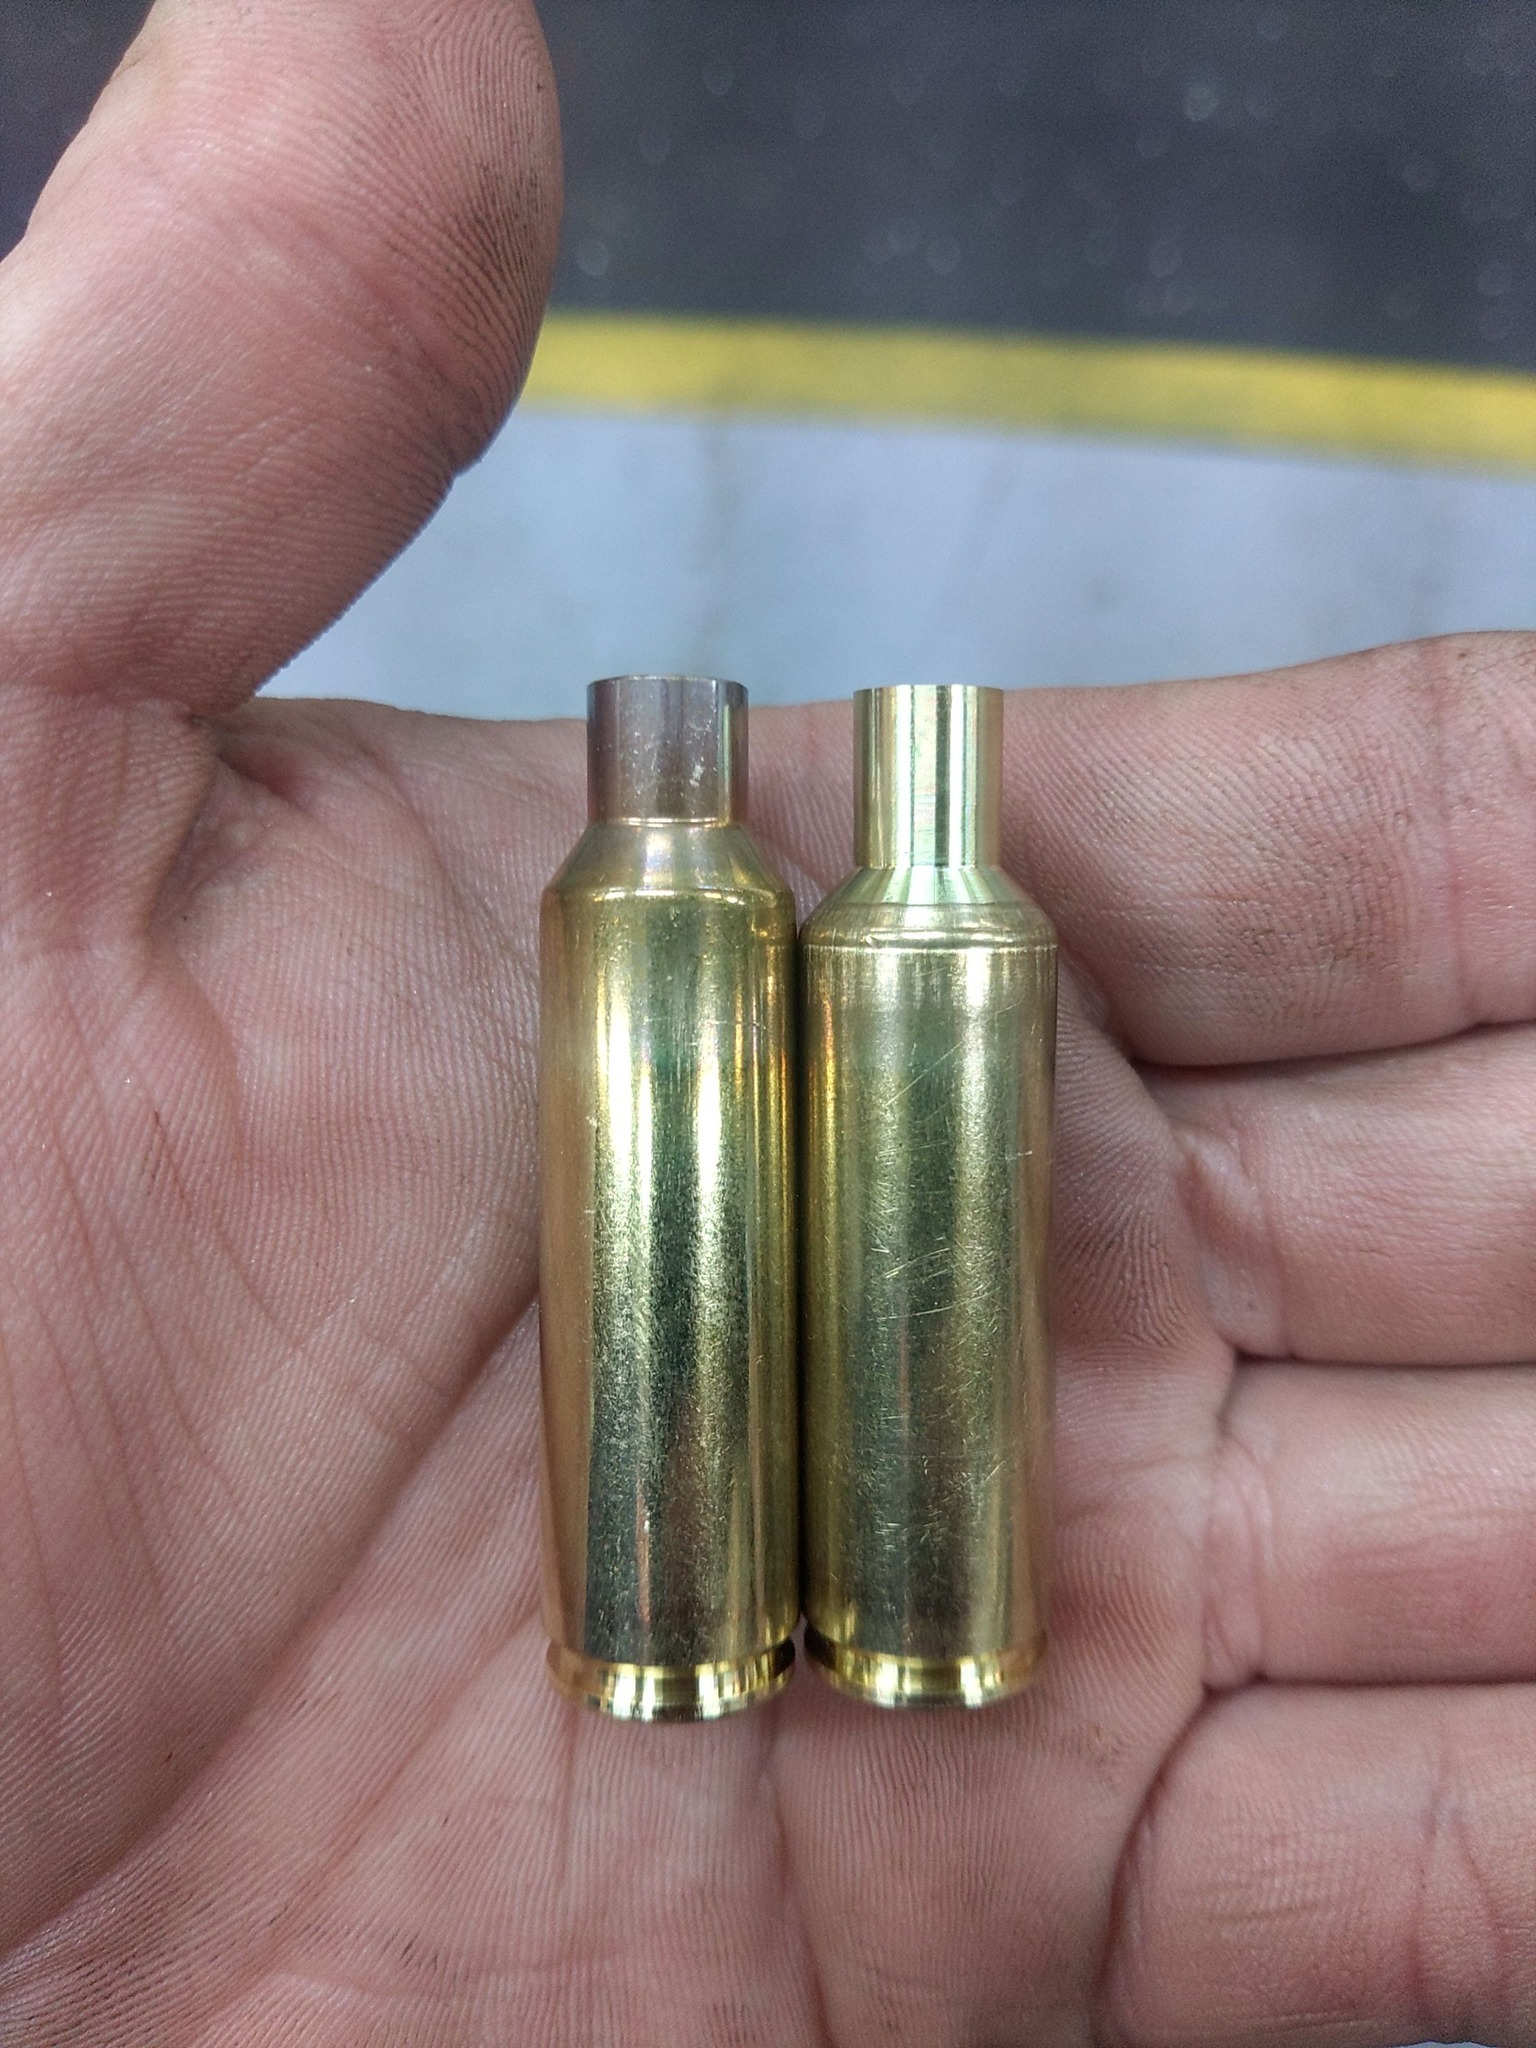 |
At this point, your brass is ready to load. We do not recommend tumbling the brass to remove the case lube. Instead, use a microfiber cloth to wipe down the outside of each case. Leave the interior neck lube in place, as it does not affect the gunpowder and can actually promote more consistent bullet seating. On the left is a nonmodified 300 BSM case, on the right is a 7 BSM case after forming, but before trimming to the overall length. The case neck has already been turned to the .0125” neck wall thickness at this point. |
Freebore and Donut Considerations
|
|
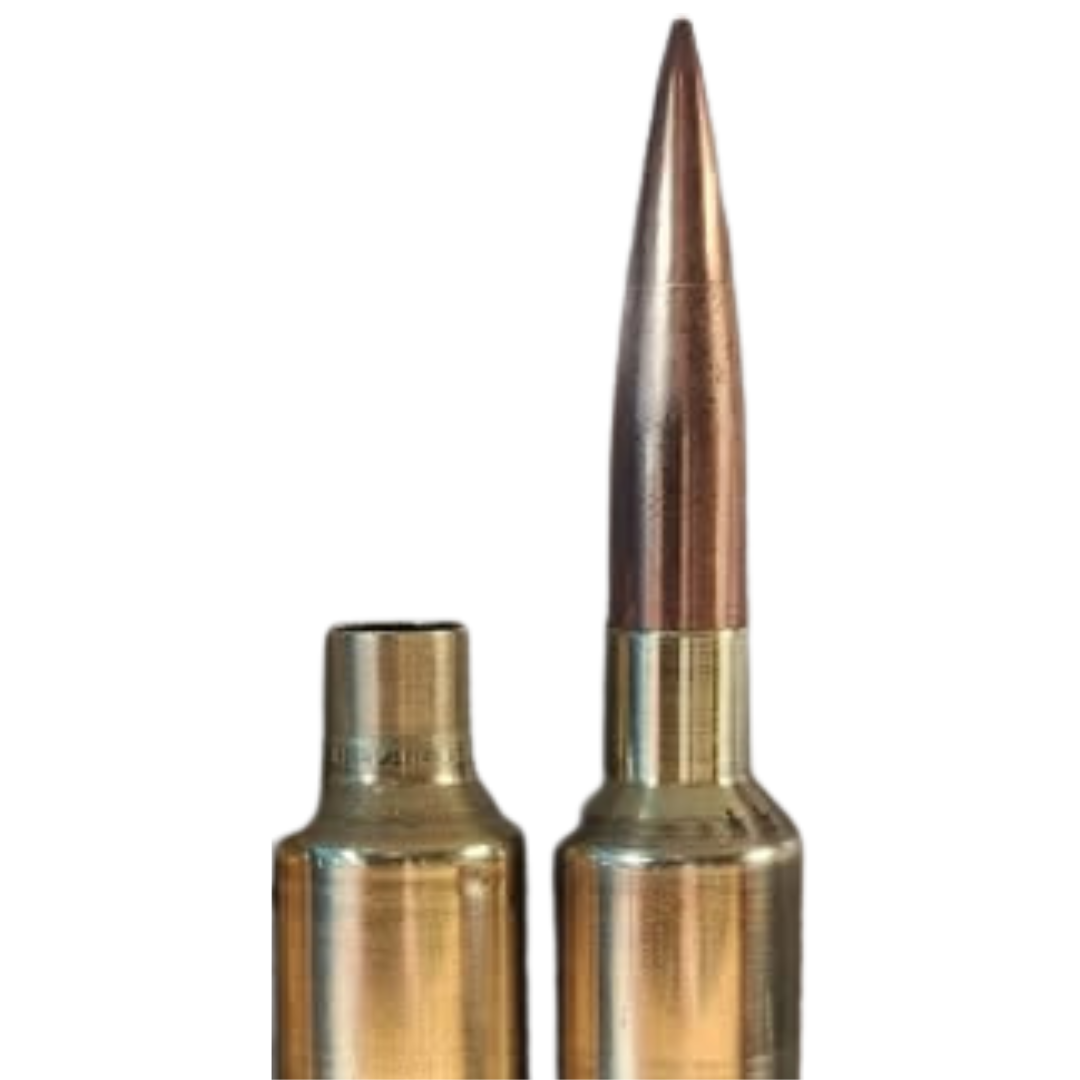
The current 7 BSM chamber reamers feature a .260” freebore length. When seating a Berger 180 Hybrid bullet to touch the lands, approximately .175” of bullet bearing surface is held by the case, while the boat tail remains above the neck/shoulder junction. If you're using an AUTODOD or IDOD system to turn the inside and outside of the neck simultaneously, you'll eliminate the formation of a donut altogether. However, if you've only turned the exterior neck on a mandrel, there's a chance a small internal donut may form at the neck/shoulder junction after sizing. In that case, you have two options:
|
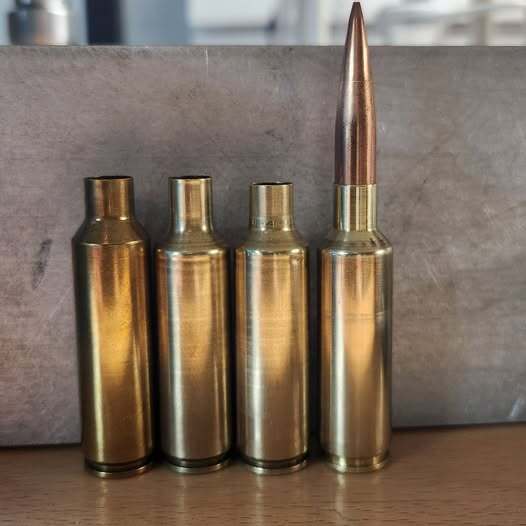 Shown here is the cases after fully formed.
Recommended Components
Bullets:
-
180 gr Hybrid Target
-
184 gr Berger Hybrid Target
-
190 gr Berger Long Range Hybrid Target
Powders:
-
Reloder 16
-
Reloder 23
-
Hodgdon 4831SC
-
Hodgdon 4831
-
Vihtavuori N555
-
Vihtavuori N565
This is just a short list of what we believe are the core powders that will burn and work efficiently in the 7 BSM. There are plenty of other powders that also can work, yet they may be temperature sensitive and or not burn efficiently in the case.
Primers:
This is another topic where many options and combinations can work well. Only LARGE RIFLE primers shall be used, either magnum or standard.
-
Federal 210 (match or non‑match)
-
Federal 215 (match or non‑match)
-
CCI BR2
-
CCI 200
There are other primers that may work well in your testing.
Ladder Data

With 180 grain bullets, this is a starting point for each previously mentioned powder:
Reloder 16 = 55 grains, we have went up to 58, in the winter we have used 57.5 for a velocity around 2980, in the 110 degree Phoenix weather in the summer we have brought this down to 56.5 to maintain the same velocity area.
Reloder 23 = 58 grain starting point and we have went up to 60.5.
Vihtavuori N555 = 56.5 starting point and up to 59.0
Vihtavuori N565 = 60.0 starting point and up to 64 grains.
The 180 grain bullets like to tune in the area of 2940, 2975, 3030 and 3060 FPS.
Target Photos
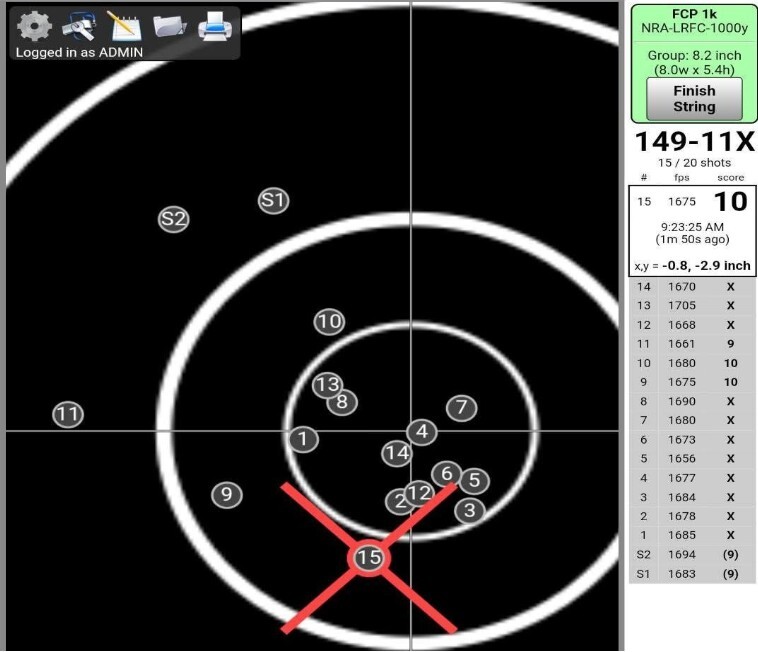
1000 Yards:
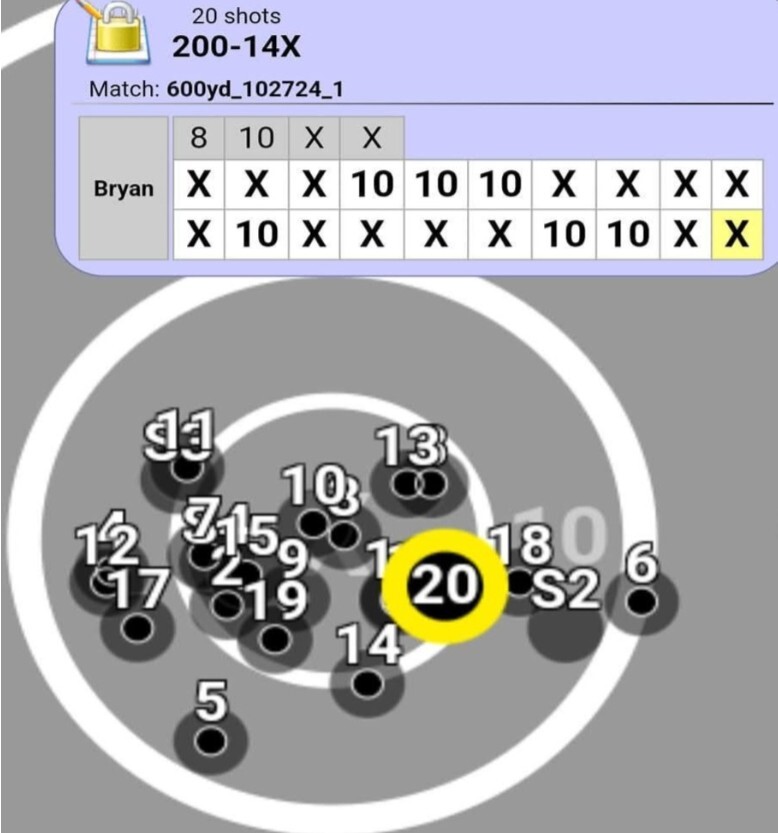
600 Yards:
7 BSM Bundle Kit
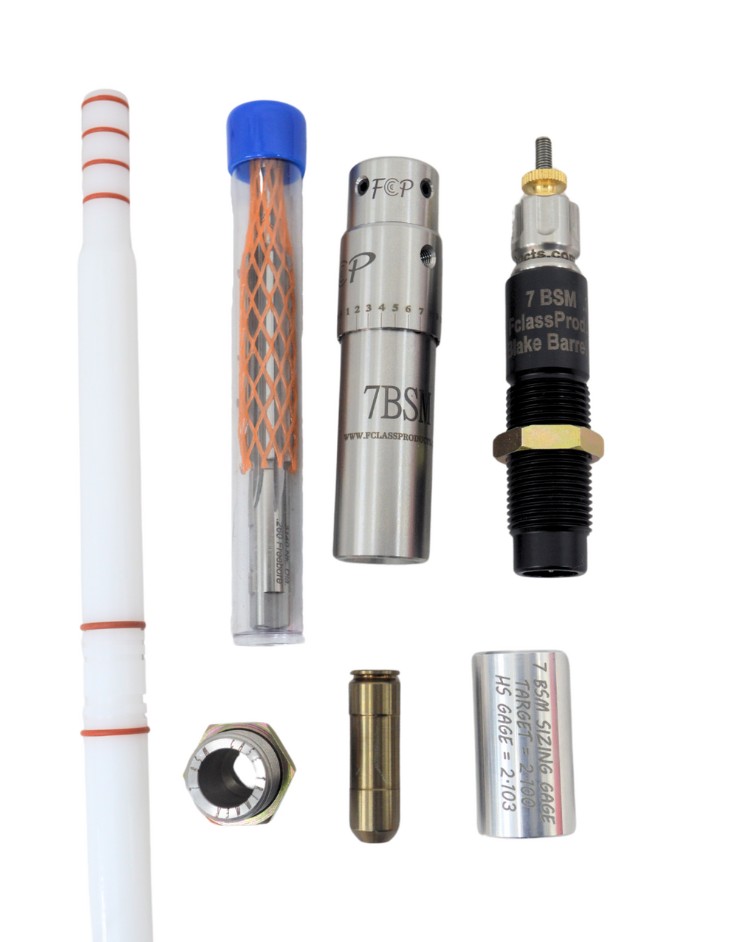
When you order the complete 7 BSM Bundle Kit from our website FClassProducts.com, you receive all the precision tools and accessories needed to form, prepare, and maintain your brass:
7 BSM Bundle Kit Includes -
-
7 BSM JGS .314NK .260FB Reamer
-
7 BSM Go Gauge
-
7 BSM .306NK Full Length Resizing Die + Decapping Rod Assembly
-
7 BSM Case Resizing Gauge
-
7 BSM Click Adjust Seating Die
-
Giraud Trimmer case holder
-
IDOD/Autodod case holder
-
7 BSM/FCP Bore Guide
We will continue to update this 7 BSM guide over time.